After long and hard internal debate about the type of aromatic flowering shrub that I would put in my yard's only semi-sunny spot I ordered French Lilac. Partially because it is hardy and drought resistant, and partially because it would remind me of my homeland, Russia. Lilac grows next to the building where I grew up, and all around my hometown... I miss it very much.
The lilac will hopefully become an impressive bush sometime down the road, but as of right now, it is a pair of pathetic-looking twigs with 6 leaves and a few buds. It does not appear to be "growing vigorously" yet - perhaps, because it is October. I am getting worried it might die during the winter, so I decided to move it indoors. It will be my second indoor plant in ages (my first indoor plans is Aloe Vera, and I bought it just a few weeks ago). I really don't have alot of well-lit areas inside that are safe from dogs and other potential dangers, but I still think that it would be best to move it here.
The problem is - I need a tall enough and sturdy enough pot to keep the dogs away, and I think I found one, but I want the lilac to go into some kind of a container that I can pull out and replant with minimum root disturbance next Spring. So, I am on a mission to find an ecologically friendly container that would be sturdy enough to survive 4-5 months being undergrounds and exposed to moisture and other elements, and yet hold it's shape will the time I decide to transport the plan into the ground.
Wednesday, October 27, 2010
Tuesday, October 19, 2010
Renee's pumpkin present
Renee and Richard decided to invite us for a dinner at their place, so I thought that bringing along a little seasonal gift would be a good gesture. So, I decided to try out my "waxed pumpkin flower pot" idea. My previous experiments showed that Vaseline did a great job at preserving the pumpkin flower pots, so I decided to try out the bee wax as an even heavier-duty preservative. I read up on the old-days canteen making with hot wax, so I had a general idea on what to do.
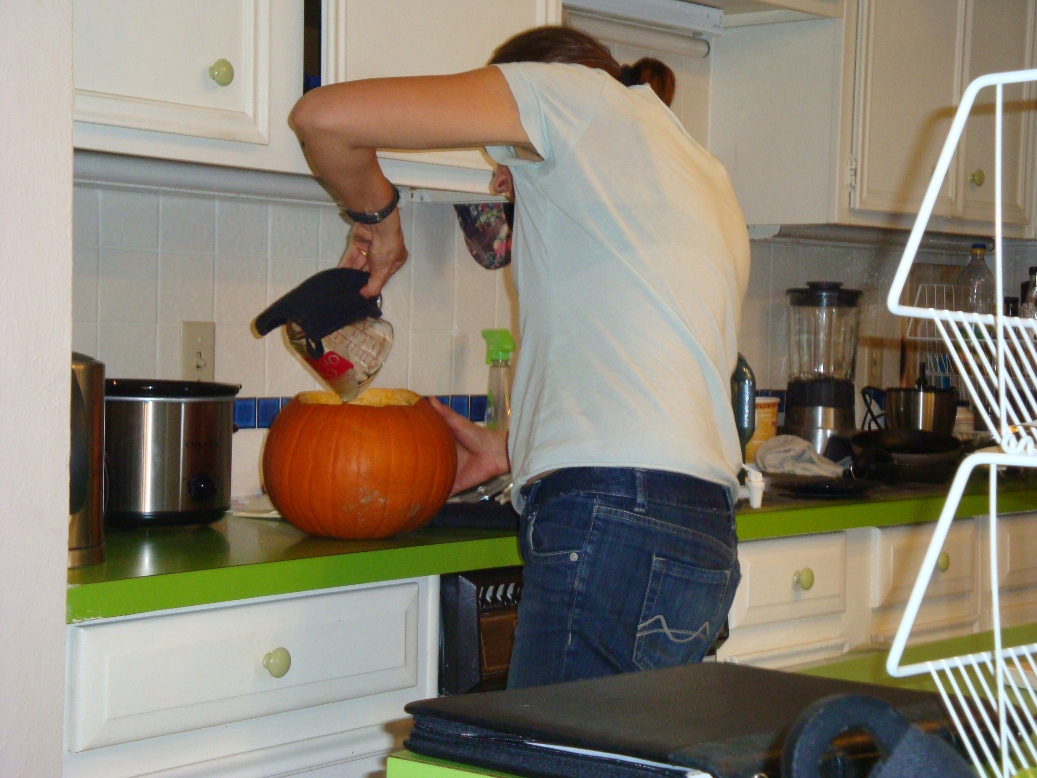
So, here we go, I got a good-size pumpkin, very carefully scrubbed (to avoid any deep cut where a mold could start to grow). I got about 5 oz of melted wax. I also decided to sprinkle some cinnamon on the walls of the pumpkin, to capture the "holiday scent" inside. As another olfactory-pleasing measure, I added a few drops of clove oil to the wax. So, let the fun begin....


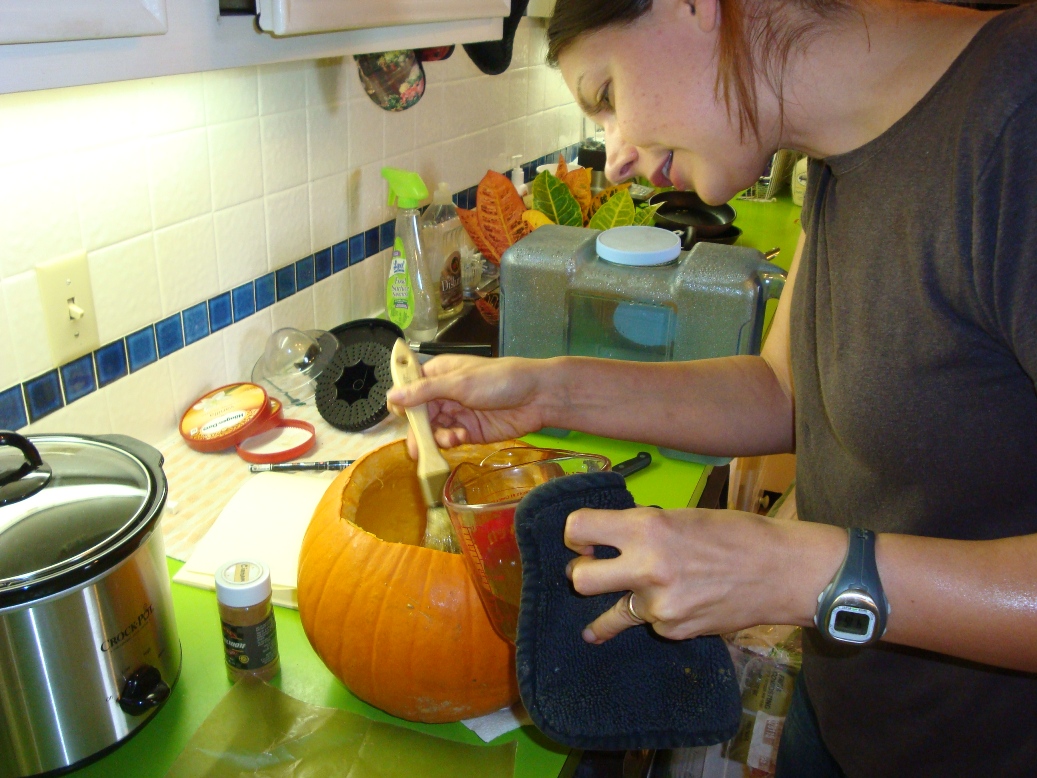
Voila! A nicely coated pumpkin - almost to the edges! I could not coat the edges. The wax was cooling down too quickly, and swooshing hot wax too close to my hands was too scary, so I decided to try a paint brush to finish up the top part. Melting more hot wax took time that I did not budget in, but hey, it was too late to be coming up with any other presents. So, I worked as fast as I could.


 I went over the edges several times, to make sure that all crevices and cuts were well-coated, to retard future molding and moisture loss for as long as possible.


After the wax hardened (just barely!), I could insert the flower pot.

I thinned the leaves of the flower a bit, so they would not look too bushy. The last touch was making a maple-leaf shapes note, drawing a smiling face on the pumpkin, and making a straw broom to bring home the message that the pumpkin was actually a face. The broom-making experience was a bit of a challenge at first, but became my favorite part quickly.

Unfortunately, we were starting to run late, so in a hurry I forgot to make a picture of the final product. I will see if I could get it from Renee later.
So, here we go, I got a good-size pumpkin, very carefully scrubbed (to avoid any deep cut where a mold could start to grow). I got about 5 oz of melted wax. I also decided to sprinkle some cinnamon on the walls of the pumpkin, to capture the "holiday scent" inside. As another olfactory-pleasing measure, I added a few drops of clove oil to the wax. So, let the fun begin....


Voila! A nicely coated pumpkin - almost to the edges! I could not coat the edges. The wax was cooling down too quickly, and swooshing hot wax too close to my hands was too scary, so I decided to try a paint brush to finish up the top part. Melting more hot wax took time that I did not budget in, but hey, it was too late to be coming up with any other presents. So, I worked as fast as I could.


After the wax hardened (just barely!), I could insert the flower pot.

I thinned the leaves of the flower a bit, so they would not look too bushy. The last touch was making a maple-leaf shapes note, drawing a smiling face on the pumpkin, and making a straw broom to bring home the message that the pumpkin was actually a face. The broom-making experience was a bit of a challenge at first, but became my favorite part quickly.

Unfortunately, we were starting to run late, so in a hurry I forgot to make a picture of the final product. I will see if I could get it from Renee later.
Candle "Orange Alien"
I was wondering what would happen if I poured hot wax into a scrubbed-clean pumpkin shell. Would it smell like baked pumpkin? And what is I added some cinnamon to the wax? There was only one way to find out...
So, here we go. A baby-pumpkin candle experiment ready to start. Pumpkin is nicely cleaned out and the wick is ready to go. I decided to do two wicks, because I didn't think that one would have a chance to melt even a third of the volume of the wax.


I pre-mixed the ground cinnamon with the hot bee wax and poured it into the shell. The cinnamon made the cooling wax to appear "dirty" in color, but it smelled great.

The result was a very cute little thing that looked great on the dining table, but I made it way too shallow. The wick burned almost to the holder before the was on the edges started to warm up.


When it was burning, it looked like a glowing orange face with flickering eyelashes, very eery. It did not smell like pumpkin, though. It did not even smell too much like cinnamon. Smelled more like hot honey.
Next time I think I will put 3 wicks in place, so the burning candle would look almost like a face :)
Меня мучил вопрос - будет ли свечка пахнуть, как пекущаяся тыква, если я залью ее горячим воском и зажгу? А так же, как будет пахнуть свечка, если я в горячий воск добавлю корицы? Как обычно, узнать ответы на эти вопросы можно было только одним способом....
Итак, малюсенький тыквенок был выбран для экспериментальной заливки. Два фитиля были приготовлены, как надо (я рещила, что раз база у свечки широкая, то один фитиль не справится). Я смешала корицу с горячим пчелиным воском (очень вкусно запахло, медом и корицей) и - вперед. Вышло очень симпатично, есди поставить в центр обеденного стола зажженной. Когда весь воск разогрелся, то было похоже на лицо солнца - оранжевое, мерцающее, с живыми пламенными глазами. В следующий раз я решила сделать 3 фитиля, чтоб еще больше на лицо походило.
К сожалению, ни запаха тыквы, ни запаха корицы особо заметно не было, зато горячим медом пахло обалденно.
Sunday, October 17, 2010
A composter dream come true
I was not really thinking about a tumbling composter until I saw one at Home Depot. Since that moment, I was restless, because I really wanted to start putting to use all the darn leaves that my neighbors' two trees are shedding into my yard. I hate to put them in the trash, or even in the recycled bags, because I know that they could be a great (and free) nutrition for my yard. So, I was preoccupied with various composing dreams and ideas for several days before I decided to bring the subject up with my husband. Since he did not mind, I went and bought the pretty-looking black behemoth called Garden Views 60 Gal. Dynamic Spinning Composter
at Home Deport for $98. It looked awesome on the picture. I did my research - there were not alot of reviews on that item on the Net, but at least one guy reported liking it, so I decided to take a plunge. So, I brought my purchase home, glowing with anticipation.

But putting that little boy together proved to be a mission impossible for me. The barrel was made of thin interlocking plastic sections that would not snap together for me no matter how I tried. After 30 or 40 min of puffing and cussing, I finally broke one of the snapping extensions, and that was the end of it (and of my patience). I tossed all the parts back into the box and sadly headed back to Home Depot to do a return.
But the vivid dreams of a tumbling composter were still marching through in my inner vision. So, from Home Depot I drove straight to Lowes and, to my delight, they were carrying a different, seemingly more sturdy version - Suncast 49 Gal Tumbling Composter for $98. The barrel looked pre-assembled, which was a selling point for me. I took the new baby home the same day.

Even though the barrel came in two large pieces and required little assembly, getting the rest of the construction set up took some time and some help from my husband.
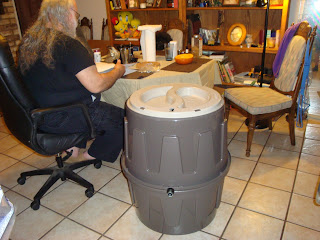 But eventually (about an hour later), the joy of my heart was standing up and looking pretty in our dining room.

The whole thing was bigger and heavier than I would like, and I was not quiet sure where in my yard it would actually fit, but those minor consideration could not distract me from my joy - I was now a tumbling composter owner, and I was ready to start composting!

at Home Deport for $98. It looked awesome on the picture. I did my research - there were not alot of reviews on that item on the Net, but at least one guy reported liking it, so I decided to take a plunge. So, I brought my purchase home, glowing with anticipation.

But putting that little boy together proved to be a mission impossible for me. The barrel was made of thin interlocking plastic sections that would not snap together for me no matter how I tried. After 30 or 40 min of puffing and cussing, I finally broke one of the snapping extensions, and that was the end of it (and of my patience). I tossed all the parts back into the box and sadly headed back to Home Depot to do a return.
But the vivid dreams of a tumbling composter were still marching through in my inner vision. So, from Home Depot I drove straight to Lowes and, to my delight, they were carrying a different, seemingly more sturdy version - Suncast 49 Gal Tumbling Composter for $98. The barrel looked pre-assembled, which was a selling point for me. I took the new baby home the same day.

Even though the barrel came in two large pieces and required little assembly, getting the rest of the construction set up took some time and some help from my husband.


The whole thing was bigger and heavier than I would like, and I was not quiet sure where in my yard it would actually fit, but those minor consideration could not distract me from my joy - I was now a tumbling composter owner, and I was ready to start composting!

Troubling realization
Hmmm, very recently I realized that some parts of my garden are completely in the shade of either Particia's tree (on the west side of the yard) or the walnut tree on the east side of the yard. As a results, even though the yard is on the south side of the building, my yard is either in the partial shade or full shade pretty much at all times. Unfortunately, both the flower bed #1 and the flower bed #3 (the ones I actually plan to utilize for planing) are in the most heaving shaded areas. The flower bed #2, the one I plan to use as a doggy toilet, is the sunniest spot in the entire yard. That makes me reconsider my original yard design. Grrr....

Не так давно, одним солнечный днем, я в первый раз заметила, что большинство моего двора затенено деревьями. Я западной стороны у моих соседей растет огромный дуб (или нечто похожее), а с восточной стороны у моих вторых соседей растет ореховое дерево. В итоге, несмотря на то, что двор расположен на южной стороне дома, в любое время дня практически 80-90% дворя находятся в тени. К сожалению, мои грядки №1 и №3 (по обоим сторонам двора) находятся непосредственно под деревьями, и, поэтому, самые затененные. Грядка №2, которую я планировала сделать собавьим туалетом, получает больше всего солнца. А так же полоса земли прямо возле гаража тоже получает больше всего солнца.
Эти новые соображения вносят изменения в мои изначальный план. Хммм...
Subscribe to:
Posts (Atom)